

How To Put A Background In Gimp Animation
Here, I will briefly summarize how I made "My first GIF animation with GIMP".
GIMP(GNU Image Manipulation Programme) is a free software raster graphics editor. Y'all can download GIMP two.6 from http://www.gimp.org .
The animation I made for the tutorial shown here. --> ![]()
It's v frame animation changing colors of tiny rectangles.
OK, let's commencement.
(1) Since you have GIMP installed, fourth dimension to run it. My tutorial is based on GIMP ii.half-dozen.seven.
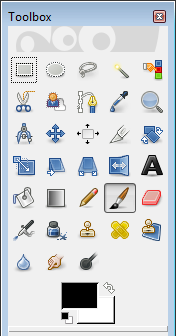
After you lot fire upwardly GIMP, you should run into three master windows. The main windows are the Toolbox with its Tool Options, image windows, and the Layers dialog.
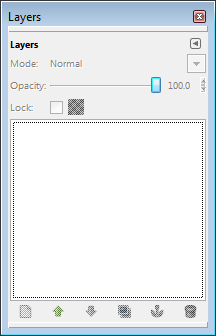
(2) If you do non see the Layers dialog, you lot tin open up it from the top bill of fare. Windows -> Dockable Dialogs -> Layers or Ctrl+L.
(three) Now, it'due south time to create a new image. Go to the height File menu and select "New..."
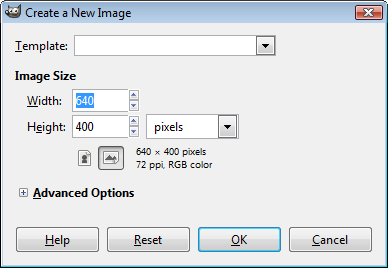
Though in the sample blitheness I used 50x50 for the image size, hither, we can take the prototype size every bit in the default, so striking OK.
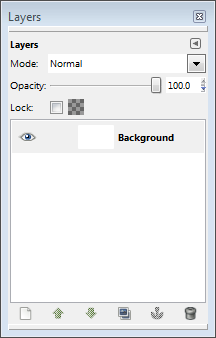
(4) You will come across some changes in the Paradigm and Layers window. We now have a background.
(five) Nosotros need more than layers to make frames for animation. So, permit'southward create 4 more layers by duplicating the background. Go to the top carte du jour and select "Duplicate Layer" nether "Layer". Repeat it until we take 5 layers in the Layers window equally in the motion picture below. The bottom layer volition be the first frame and the top layer will be the last frame in the animation
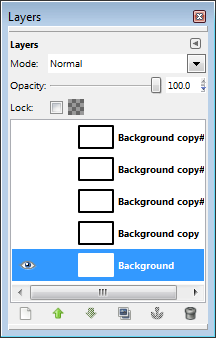
In the picture, I toggled off the eyes of the layers except the kickoff frame which is the background. The eye indicates we see the anything on the layer. And so, it's more convenient turning off the eyes of the other layers and concentrate on the current layer. The other thing is the highlight. We can highlight a certain layer and brand it current. Highlighted layer is in blue colour every bit in the picture above.
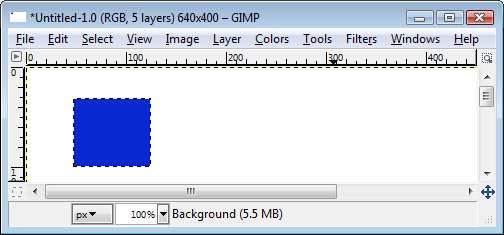
(6) Permit'due south draw someting in the Image window.
Select a rectangular region using "Rectangle Select Tool" from the Toolbox. And then fill the selected rectangle with "Saucepan Fill Tool" as int the picture show below.
(7) Do the same to other layers.
Toggle off the eye of the bottom layer and toggle on the eye of the next layer and highlight the layer to brand it current as in the motion picture below.
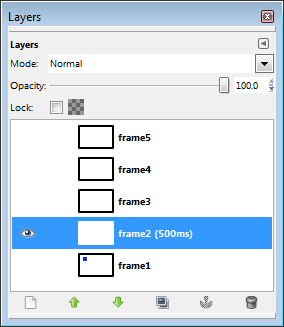
(8) You can change the proper noun of the frame and set up time filibuster.
As you see in the picture above, I inverse the frame names to frame1 to frame5. You do not have to rename them since GIMP knows what to do with the frames. Notice the unit of the time delay is in "ms". 1/1000 second. To change the name, you exercise correct mouse click on the layer and then select "Edit Layer Attributes...". Then "Layer Attributes" window pops upward as in the picture below.

(9) Now you have all the frames ready. Time to cheque how it looks in the animation.
Go to the tiptop menu: Filters -> Blitheness -> Playback...
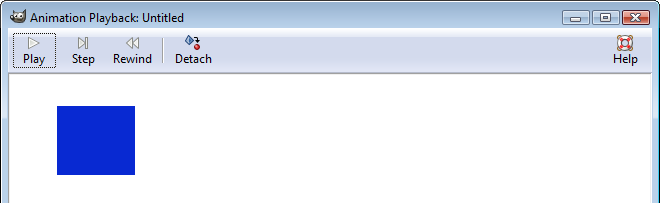
Click Play and come across what you've got.
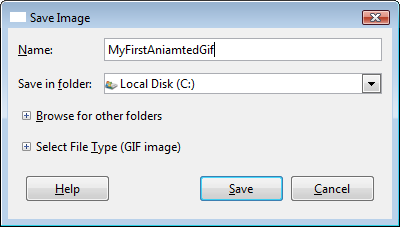
(10) Fourth dimension to save the animated GIF file.
Get to File carte du jour and save it "Save As..."
Now we take "Salvage Prototype" window and I typed the name "MyFirstAnimatedGif"
(eleven) How near file type? Of form, information technology's gif.
Expand the "Select File Type (GIF Image) as in the the moving-picture show below.
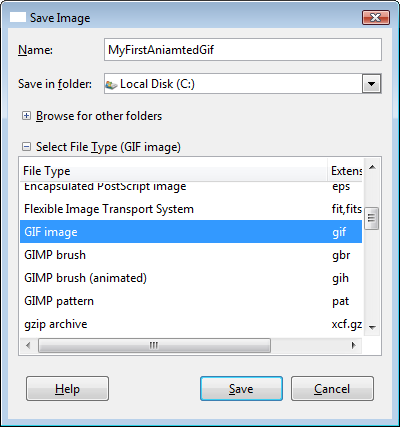
Select "GIF image" and "Save".
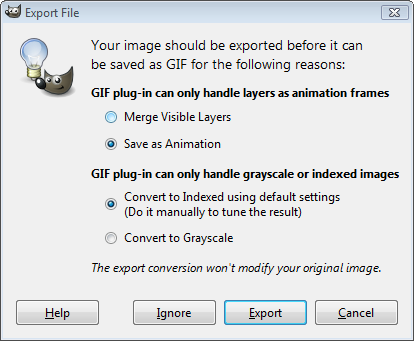
(12) Exporting file every bit an Animation.
At the "Save", y'all will have "Consign File" window. Choose "Save every bit Animation" equally in the the moving picture beneath. Click "Export".
(13) Last Step. Click "Save" on "Salve as GIF" window

(fourteen) Extra Pace.
If you want to see your animation, put your gif for the "src" name in the simplest html lawmaking below.
(15) Adept Luck.
2. Using Image
I used the following Duke files to brand the aniamtion shown hither.
The steps to make Duke blitheness are almost the same equally in the Section.1 "The Simplest" case. I volition briefly describe the differences in each step.
Step iii:
Adapt the size of the prototype, nigh 55 x 68.
Step 5:
Instead of making duplication of background, go to "File" bill of fare. Open up each paradigm as "Open up as Layers...". Do this 10 times since we have 10 images. So we will take 10 frames with one background in "Layers.." dialog
Step vi,7: Skip.
But we need to remove transparency for each iamge. To exercise this, right click on the image in Layer window, select "Remove blastoff Channel" from the popup window.
(Note) For some case, nosotros need to add transparency to an image. Here is a cursory tutorial for adding alpha channel with GIMP.
Follow the other steps. Then, you will have the "Duke Blitheness".
Source: https://www.bogotobogo.com/Gif/gif-tutorial.php
Posted by: stephensbuturing1944.blogspot.com
0 Response to "How To Put A Background In Gimp Animation"
Post a Comment